Connecting Embeddable to ClickHouse
In Embeddable you define Data Models and Components in code (stored in your own code repository) and use our SDK to make these available for your team in the powerful Embeddable no-code builder.
The end result is the ability to deliver fast, interactive customer-facing analytics directly in your product; designed by your product team; built by your engineering team; maintained by your customer-facing and data teams. Exactly the way it should be.
Built-in row-level security means that every user only ever sees exactly the data they’re allowed to see. And two levels of fully-configurable caching mean you can deliver fast, realtime analytics at scale.
1. Gather your connection details
To connect to ClickHouse with HTTP(S) you need this information:
The HOST and PORT: typically, the port is 8443 when using TLS or 8123 when not using TLS.
The DATABASE NAME: out of the box, there is a database named
default, use the name of the database that you want to connect to.The USERNAME and PASSWORD: out of the box, the username is
default. Use the username appropriate for your use case.
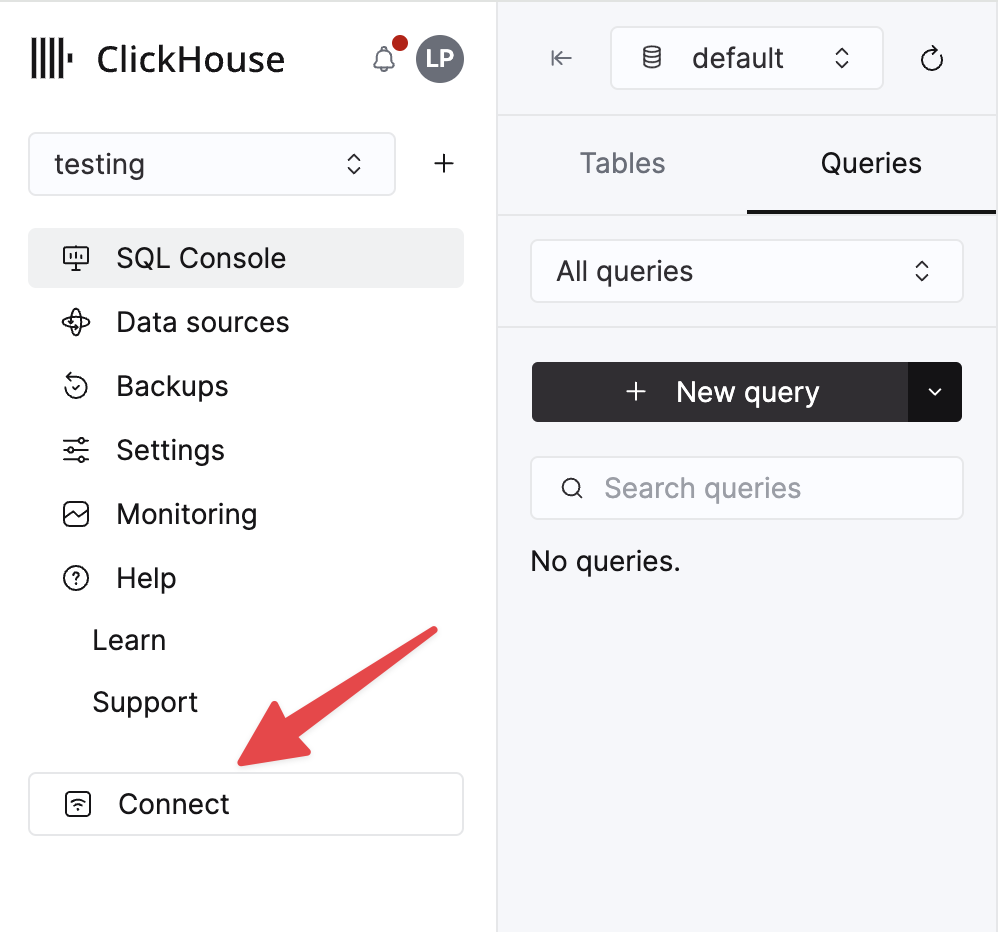
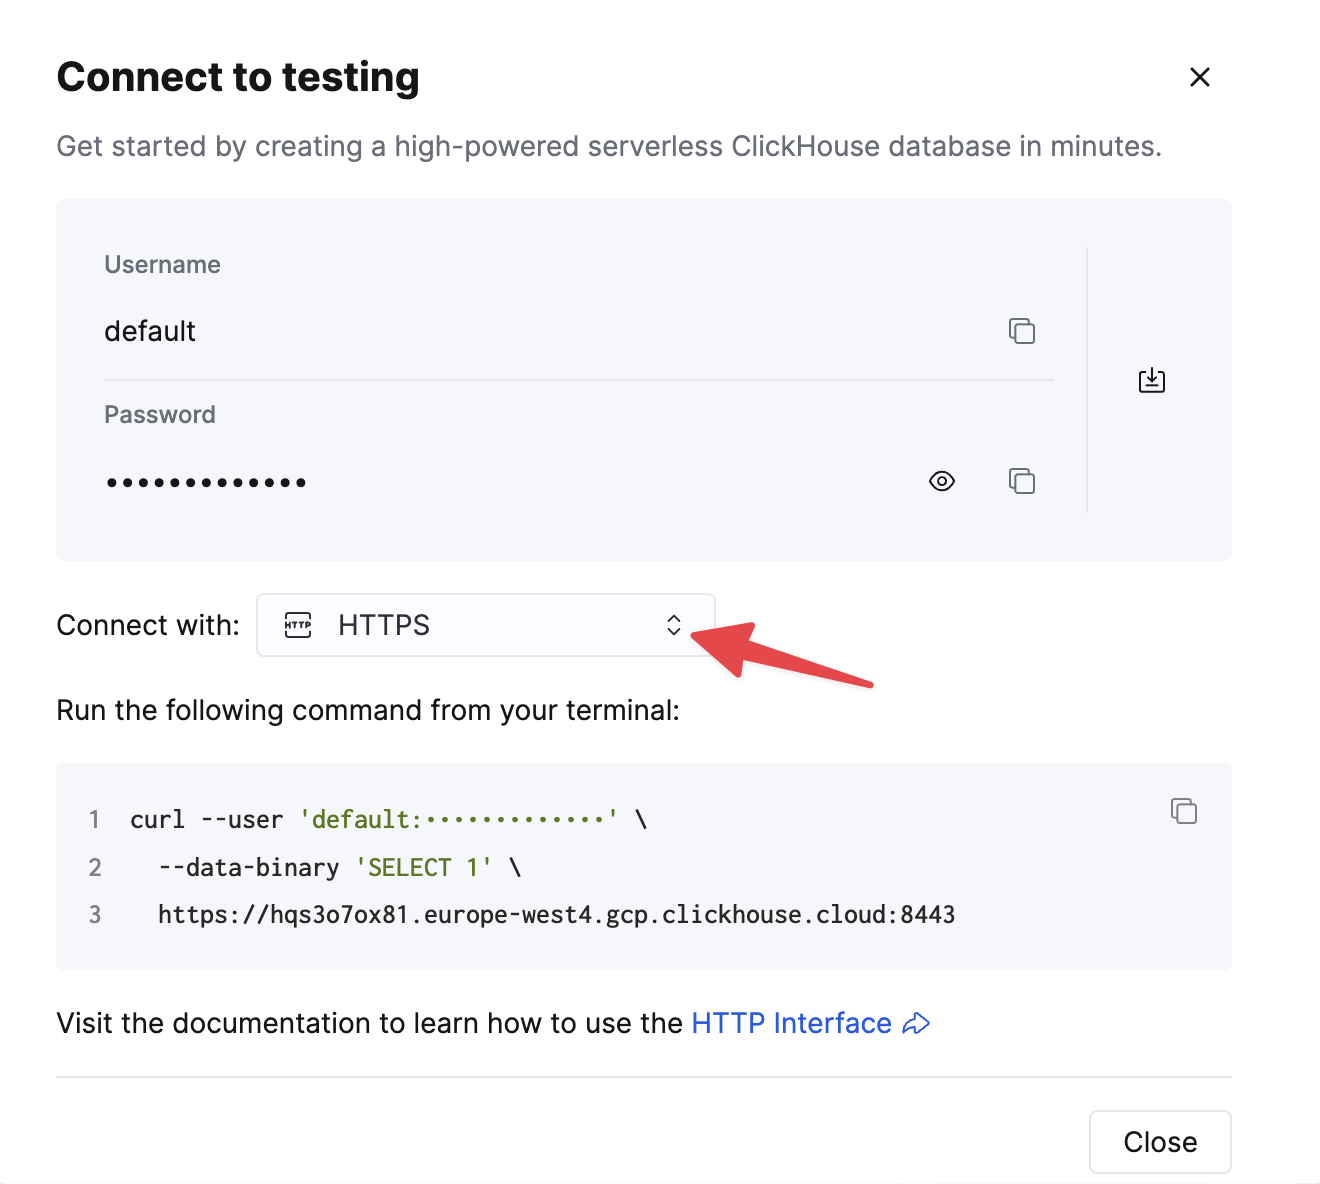
The details for your ClickHouse Cloud service are available in the ClickHouse Cloud console. Select the service that you will connect to and click Connect:

Choose HTTPS, and the details are available in an example curl command.

If you are using self-managed ClickHouse, the connection details are set by your ClickHouse administrator.
2. Create a ClickHouse connection type
You add a database connection using Embeddable API. This connection is used to connect to your ClickHouse service. You can add a connection using the following API call:
// for security reasons, this must *never* be called from your client-side
fetch('https://api.embeddable.com/api/v1/connections', {
  method: 'POST',
  headers: {
    'Content-Type': 'application/json',
    Accept: 'application/json',
    Authorization: `Bearer ${apiKey}` /* keep your API Key secure */,
  },
  body: JSON.stringify({
    name: 'my-clickhouse-db',
    type: 'clickhouse',
    credentials: {
      host: 'my.clickhouse.host',
      user: 'clickhouse_user',
      port: 8443,
      password: '*****',
    },
  }),
});


Response:
Status 201 { errorMessage: null }
The above represents a CREATE action, but all CRUD operations are available.
The apiKey can be found by clicking "Publish" on one of your Embeddable dashboards.
The name is a unique name to identify this connection.
- By default your data models will look for a connection called "default", but you can supply your models with different
data_sourcenames to support connecting different data models to different connections (simply specify the data_source name in the model)
The type tells Embeddable which driver to use
- Here you'll want to use
clickhouse, but you can connect multiple different datasources to one Embeddable workspace so you may use others such as:postgres,bigquery,mongodb, etc.
The credentials is a javascript object containing the necessary credentials expected by the driver
- These are securely encrypted and only used to retrieve exactly the data you have described in your data models. Embeddable strongly encourage you to create a read-only database user for each connection (Embeddable will only ever read from your database, not write).
In order to support connecting to different databases for prod, qa, test, etc (or to support different databases for different customers) you can assign each connection to an environment (see Environments API).